Checkout Widget
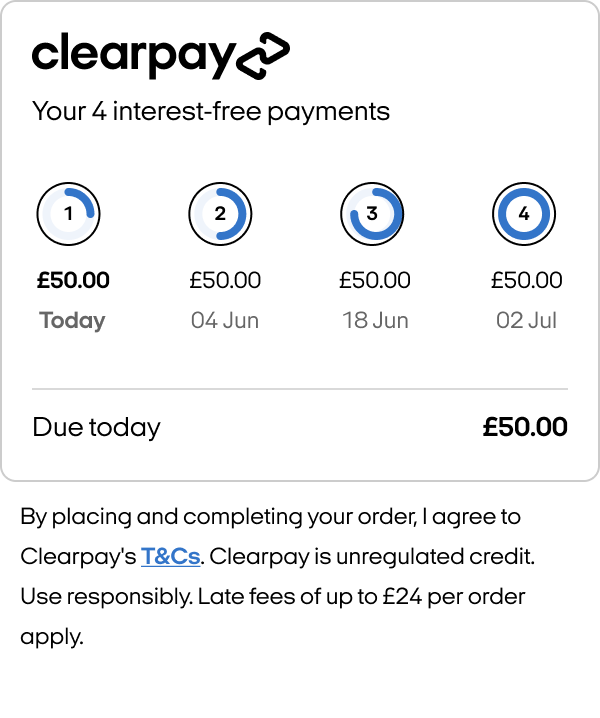
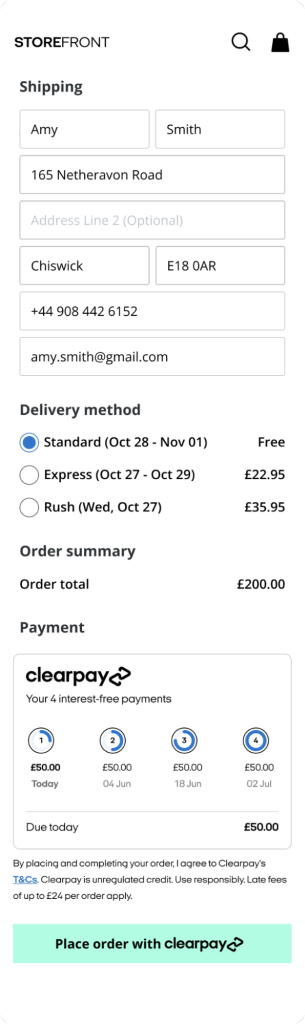
The Checkout Widget is a component that needs to be placed on your site if the order value is subject to change after the Express Checkout flow. It displays the consumer payment schedule and can be updated as the total changes (e.g. in response to shipping costs and promo codes).
It can be used to enable dynamic order total updates on a review page for both Express Checkout and standard Clearpay Checkout.
It serves several purposes:
- To ensure the user has seen and agreed to an accurate payment schedule.
- To verify that the final amount captured matches what the user has seen.
- To provide information to the merchant such as the first payment amount for display purposes.
- To inform the merchant of any barriers to purchase, for instance the user having gone over their payment limit with Clearpay.
Rendering the Checkout Widget
The widget can be rendered into a target container on your page using Javascript. It is responsive and will fit any container with a minimum width of 300 pixels.
Updating the Order Total
Any time the order total changes (e.g. a change of shipping option, promo code, or cart contents), the widget must be notified of the new amount. An initial update must also be performed in the onReady callback to initialize the widget.
Getting the Widget’s State
After each update and on any other state changes, the onChange callback will be called with an HTML event argument. At this point the widget’s state should be retrieved from event.data, which will have the properties:
We recommend using the isValid and amountDueToday states to update your checkout UI as described above, and persisting the paymentScheduleChecksum on your backend to be used when calling Confirm Checkout. The widget itself will inform the user what has gone wrong when isValid is false.
In addition to the onChange callback, these states are exposed as properties on the widget and can be accessed directly at any time, e.g.:
Handling Widget Errors
Any errors on the widget will trigger the onError callback with an HTML event as described above, and will have an isValid state of false. This event is in addition to the onChange callback, and is provided for convenience - it is not necessary to respond to onError events as long as all onChange events are handled.
Style options for the checkout widget
Afterpay provides an optional style attribute that you can use to toggle widget features on or off. The styles that can currently be toggled are as follows:
border: if false, the border around the widget container will be removed. Default: trueHeading: if false, the heading “Your 4 interest-free payments” will be removed. Default: truelogo: if false, the Afterpay logo will be removed. Default: true