Adding the Express Checkout Button
Options for the Clearpay Button
There are a selection of buttons available for each stage of checkout – each clearly shows the following action to the customer.
![]()
Integration assets are available here, or contact your Clearpay Merchant Services representative.
Standard Clearpay Checkout Flow
The customer proceeds through the checkout process on your site as normal, selecting Clearpay as a payment option and confirming the transaction before order placement.
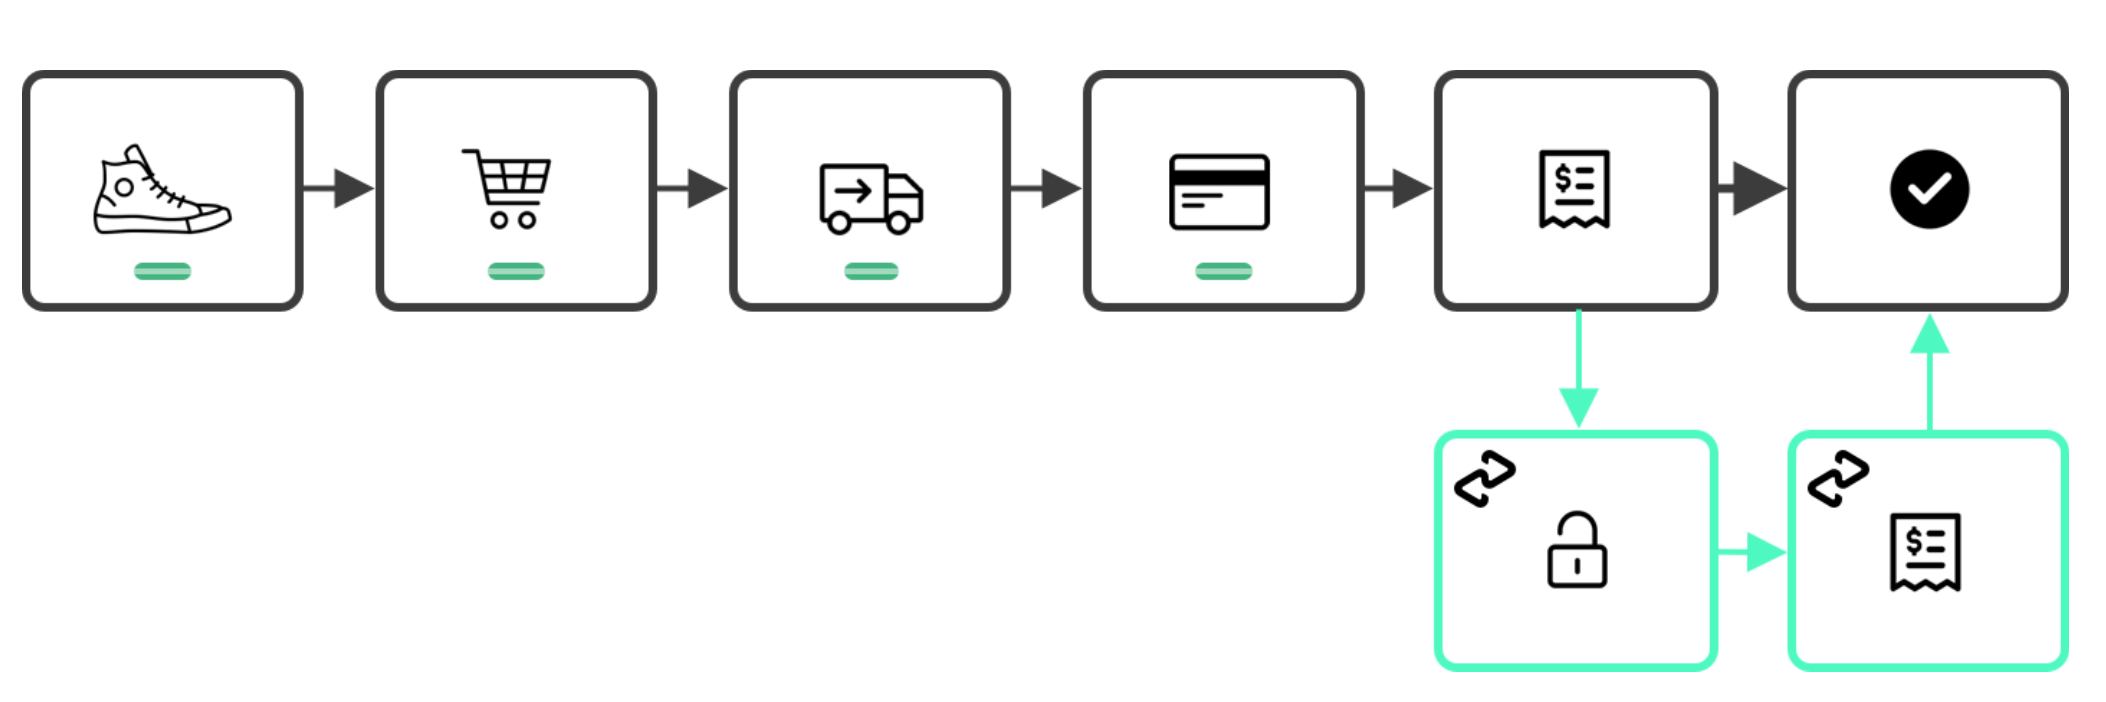
Express Checkout Flows (Cart and/or Product Pages)
Integrated Shipping: Delivery options are displayed to customers in real time, with the ability to confirm the order within Clearpay
Deferred Shipping: The customer returns to the retailer site to finalise delivery options and complete the order.

Configure the Clearpay Button
Customers can launch Clearpay from different entry points in the customer journey. To enable a smart checkout flow, create a Clearpay checkout button on your web page and assign an ID. Then set the afterpay-entry-point data attribute on the button to one of the following:
- product-page
- mini-cart
- cart
For example, a button that renders on the mini-cart:
Load afterpay.js
To launch Clearpay Express Checkout you must add the afterpay.js script on your page.
You must also set the onload attribute to point to your own function (e.g. initAfterpay) where you will perform the initialization of the popup. The contents of this function are detailed in the next section Initialize the Popup Window.
For example, loading the sandbox afterpay.js script:
Initialize the Popup Window (Express Checkout - Product/Cart Pages)
Inside your own onload function (e.g. initAfterpay), use afterpay.js to initialize the popup window by invoking initializeForPopup. Now configure the following properties:
-
Set
countryCodeto the two-character ISO 3166-1 country code of the Merchant account -
Set the flag
shippingOptionRequiredto:-
false: if you do not want shipping options displayed in the Express Checkout flow
-
true: if you want shipping options displayed to the customer within the Express Checkout flow (i.e. Integrated Shipping). This is the default value
-
-
Set
targetto the ID (or class if multiple buttons need to be targeted on the same page) assigned to your button that will trigger the checkout process -
Handle lifecycle events:
-
onCommenceCheckout: This is where the retrieval of the Afterpay token from your server occurs. Once retrieved, to start the checkout process call
actions.resolve(TOKEN) -
onComplete: see The onComplete Callback section below for more details
-
Full Example with Deferred Shipping
During Clearpay Express Checkout
When the customer clicks the Clearpay checkout button, a popup launches. The customer is prompted to login and review their order details. They can choose a payment method and delivery address, and, if you are using Integrated Shipping, they are also presented with shipping options for that address.
Once they confirm their details on Clearpay, the popup closes and the customer returns to your site. Your page is notified of the completion through the onComplete callback.
The onComplete Callback
When the customer completes the Express Checkout flow, a call is made to the onComplete Javascript function. This function is passed an event argument with a data field event.data, which has the following properties:
Retrieve the Express Checkout Order Details
Retrieve all transaction details using the Clearpay Get Checkout API:
Verify the Transaction
A transaction integrity check must be performed to ensure that the transaction is valid. After receiving the onComplete callback, call your server to validate the transaction:
Compare the Clearpay order returned by the Get Checkout API with your own records.
This should be used as the “source of truth” for the order, and will include the customer name, email address, delivery address, and order total.
Additional Verification
Passing the total order amount when you call the Auth (or Capture if using the Immediate Payment Flow) endpoint allows Clearpay to perform its own validation.
Complete the Express Checkout Process
After retrieving the order details, you may choose to either capture payment immediately or continue the checkout on a review page. To capture payment and complete the transaction immediately, make use of Integrated Shipping with the Buy Now feature.
If you intend to continue the checkout on your site, you should:
- Pre-fill your review page using the Clearpay order details
- Allow the customer to select a delivery method (unless using Integrated Shipping)
- Optionally offer the ability to change order details and enter promo codes
- Display the Clearpay checkout widget on the final review page or at all steps of your checkout
Beware
The Clearpay Checkout Widget is mandatory if your checkout makes any changes to the order total after returning to your site.