> This page is for version v2 (default).
> For other versions, use one of these documentation indexes:
> - v2 (default): https://developers.clearpay.co.uk/v-2/llms.txt
> - v1: https://developers.clearpay.co.uk/v-1/llms.txt
> For clean Markdown of any page, append .md to the page URL.
> For a complete documentation index, see https://developers.clearpay.co.uk/llms.txt.
> For AI client integration (Claude Code, Cursor, etc.), connect to the MCP server at https://developers.clearpay.co.uk/_mcp/server.
# Display the checkout widget
Use the checkout widget to display the Clearpay payment schedule on your website. There are two ways to use the widget:
* **[Connected](#connected-widget):** Displayed after the checkout process, using an order token. If the order amount changes post-checkout, use the connected widget to update the payment schedule
* **[Unconnected](#unconnected-widget):** Displayed before the customer starts the checkout process, with no order token—just an amount
The widget is responsive and can fit into any container with a minimum width of 300px. You can render the widget into a target container on your page using JavaScript.
## Connected widget
Use the connected widget on your checkout page **after** a customer completes the Clearpay checkout flow. This widget serves several purposes:
* Ensures that the customer sees and agrees to an accurate payment schedule.
* Verifies that the final amount charged matches what the customer was shown during checkout.
* Provides the merchant with important information, like the first payment amount.
* Informs the merchant if there are any barriers to purchase, such as exceeding the Clearpay payment limit.
> **Note**
>
> **Important:** Only show the connected widget after the customer has successfully completed the Clearpay checkout (when the onComplete status is SUCCESS). You must display the connected widget during the Deferred Shipping flow.
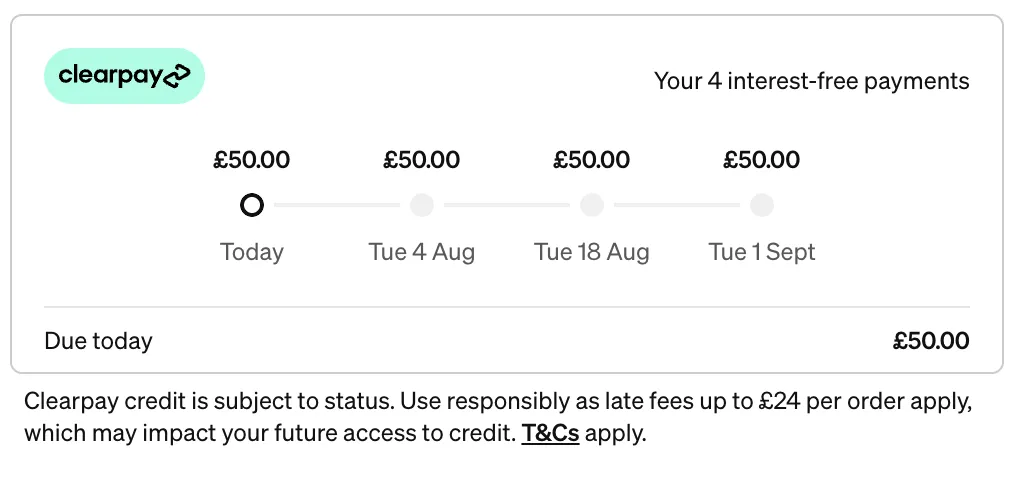
The connected widget requires:
* The Clearpay checkout token to retrieve and render the payment schedule.
* The final order amount
```html
```
### Updating the Order Total
Any time the order total changes (e.g. a change of shipping option, promo code, or cart contents), the widget must be notified of the new amount. An initial update must also be performed in the **onReady** callback to initialize the widget.
```javascript
afterpayWidget.update({
amount: { amount: "123.45", currency: "GBP" },
})
```
### Capturing payment with the connected widget
Because you can update the order after checkout has completed, the connected widget has
unique considerations. When calling the /v2/payments/capture API, the payload must contain the required amount field plus additional properties. This allows Clearpay to verify that the final order amount and payment schedule match the calculated values from the corresponding order details. These properties are:
* `isCheckoutAdjusted`: Indicates whether any changes have been made to the order since the initial creation
* `items`: The list of order items if it has changed
* `shipping`: The shipping address if it has changed
* `paymentScheduleChecksum`: The latest paymentScheduleChecksum retrieved from your widget's `onChange` call (see 'Getting the widget's state').
```json
curl --request POST
--url https://global-api-sandbox.afterpay.com/v2/payments/capture
--header 'accept: application/json'
--header 'content-type: application/json'
--data '{"token":"YOUR_TOKEN", "amount":{"amount":"10.00", "currency": "GBP"}, "isCheckoutAdjusted":true, "shipping":{"name":"Joe Customer","line1":"123 Fake Street", "postcode":"SW1A 1AA", "region":"London", "countryCode":"GB"}, "items":[{"price":{"amount":"10.00", "currency":"GBP"}, "name":"item1", "quantity":1}], "paymentScheduleChecksum":"YOUR_PAYMENT_SCHEDULE_CHECKSUM" }'
```
> **Note**
>
> **Important:** If the final `amount` doesn't match the calculated `amount` (including shipping, taxes, etc.), or if the `paymentScheduleChecksum` doesn't match the calculated payment schedule, the capture request will be rejected.
| Property | Type | Description |
| ------------------------- | ----------------- | ------------------------------------------------------------------------------------------------------------------------------------ |
| `token` | String (required) | The token returned in the Create Checkout request. |
| `amount` | Money (required) | Amount to be checked against the amount including shipping and taxes. If the amounts do not match, the request is rejected. |
| `merchantReference` | String | Order ID or reference this order corresponds to. |
| `isCheckoutAdjusted` | Boolean | Whether there have been changes to the order since the initial order creation. |
| `paymentScheduleChecksum` | String | A unique value representing the payment schedule that must be provided when there has been changes since the initial order creation. |
| `items` | Item | An array of order items that have been updated to be provided if it has changed since the initial order creation. |
| `shipping` | Contact | The shipping address for this order to be provided if it has changed since the initial order creation. |
### Getting the widget's state
After each update and on any other state changes, the onChange callback is called with an HTML event argument. At this point the widget's state is retrieved from event.data, which will have the properties in the table:
| Property | Type | Description |
| ------------------------- | ------- | ------------------------------------------------------------------------------------------------------------------------------------------------------------------------------------------------------------------------------------- |
| `isValid` | Boolean | Whether the order is okay to proceed. If false, the order should be prevented from completing. |
| `amountDueToday` | Money | The amount owing today. Displaying this value in your Order Summary will give your customer more confidence when they place their order. `amountDueToday.format()` returns a formatted string that you can easily display in your UI. |
| `paymentScheduleChecksum` | String | A unique value representing the payment schedule that must be provided when capturing the order. |
| `error` | Error | The current error state, if any. |
We recommend using the `isValid` and `amountDueToday` states to update your checkout UI as described above, and persisting the `paymentScheduleChecksum` on your backend to be used when capturing. The widget itself informs customers what has gone wrong when `isValid` is false.
In addition to the `onChange` callback, these states are exposed as properties on the widget and can be accessed directly at any time, for example:
```
var isValid = afterpayWidget.isValid
var amountDueToday = afterpayWidget.amountDueToday
var paymentScheduleChecksum = afterpayWidget.paymentScheduleChecksum
var error = afterpayWidget.error
```
### Handling widget errors
| Property | Type | Description |
| -------- | ----- | --------------------------------------------- |
| error | Error | Representing the current error state, if any. |
Any errors on the widget trigger the `onError` callback with an HTML event (see table below), and have a false `isValid` status.
If the `onChange` callback is activated and fails due to an error, the `onError` event is also triggered for convenience. In this case, a response to `onError` events is not needed, provided all `onChange` events are handled.
#### `onError` event.data properties table
| Property | Type | Description |
| --------- | ------- | -------------------------------------------------------------------------------------------------------------------------- |
| `isValid` | Boolean | Whether the order is okay to proceed. For the `onError` event this will be **false** so prevent the order from completing. |
| `type` | String | For an `onError` event, the type is set to the value of **error**. |
| `error` | Error | Represents the current error state. |
> **Note**
>
> If you are getting errors during the rendering of the widget, open the browser console. The console may display some additional error loggings to help identify some common integration misconfigurations.
## Unconnected widget
Use the unconnected widget on your checkout page **before** the customer starts the Clearpay checkout flow. This version of the widget displays an estimated payment schedule based on the initial order amount; this is only an approximation based on the initial order total.
The unconnected widget requires a defined positive `amount` to calculate the estimated payment schedule.
If the order total changes (due to shipping method, promo code, or cart contents), the widget must be notified of the new amount. Only call the update function after the widget's `onReady` callback has been triggered.
```html
```
## Styling the checkout widget
### Standard widget
The default version of the Standard Payment Schedule widget displays accurate payment schedule information, the payment amount due today, and the legal disclaimer. Note that the below images show the widget used with a grant.
Here's an example of how to initialize the standard widget, and a sample function for updating the amount to a new value.
```html