> This page is for version v2 (default).
> For other versions, use one of these documentation indexes:
> - v2 (default): https://developers.clearpay.co.uk/v-2/llms.txt
> - v1: https://developers.clearpay.co.uk/v-1/llms.txt
> For clean Markdown of any page, append .md to the page URL.
> For a complete documentation index, see https://developers.clearpay.co.uk/llms.txt.
> For AI client integration (Claude Code, Cursor, etc.), connect to the MCP server at https://developers.clearpay.co.uk/_mcp/server.
# Add a Clearpay Banner to Shopify
Banners show Clearpay information at the top of your Shopify page.
To add an Clearpay banner, you must edit your store's code. Before you start, make sure that:
* Shopify is already installed and running on your online store
* You have decided what banner you want and it conforms to guidelines
> **Recommendation**
>
> You are changing your online store's code, so be careful. We recommend you create a duplicate page and only publish it once you have verified the changes.
Follow the instructions below:
1. Click **Actions** and select *Edit Code* from the drop-down menu.
2. Scroll down to *Sections* and click **Add a new section**.
3. In the *Create a new section called* field enter **clearpay-banner**. The *clearpay-banner.liquid* tab appears.
4. Delete the code that populates the *clearpay-banner.liquid* tab.
### The Liquid file
The next task is to copy and paste the banner code snippet to the liquid file:
1. Click the link to the [banner code snippet](https://static.afterpay.com/shopify-clearpay-banner-liquid.html).
2. Click the **Copy to Clipboard** button.
3. Paste the banner code snippet into the *clearpay-banner.liquid* tab.
4. Click **Save**.
### Theme Liquid
Now you must edit the theme.liquid file. Follow the instructions below:
1. Open the *theme-liquid*.
2. Find the line with \``{% section 'header' %}`. Add the line `{% section 'clearpay-banner' %}` above it. See line 4 of the code extract below.
```liquid
{% section 'popup' %}
{% section 'announcement-bar' %}
{% section 'clearpay-banner' %}
{% section 'header' %}
```
3. Click **Save**.
### Preview and Check
To check your work:
1. Click **Preview** and verify the changes. The picture below shows a banner:

#### Optional
To make minor adjustments use the Theme Editor. Do the following:
1. Click *Customize theme* to open the Theme Editor.
2. Click *Clearpay banner* from the sidebar.
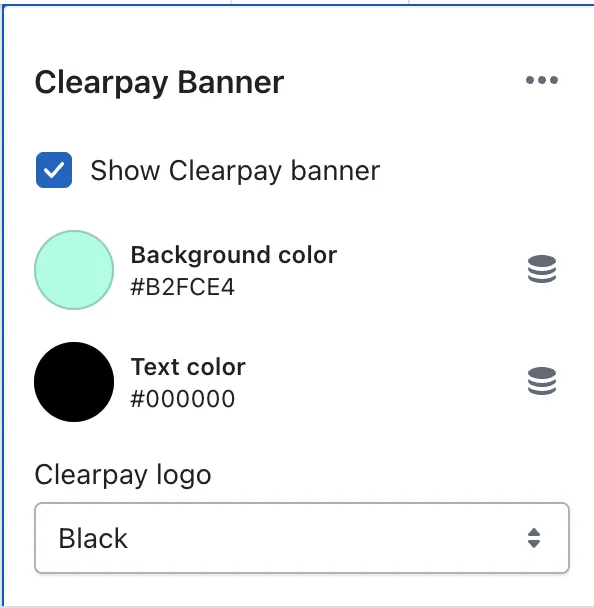
3. You can show or hide the Clearpay banner, select the background and text colors, and also select the Clearpay logo color. See picture below:
> **Brand Assets**
>
> For examples and information on all our brand assets, including banners, see the [Clearpay Marketing Resources](https://www.clearpay.co.uk/en-GB/for-retailers/resources/marketing/website) page.
\
### Change the color of the Clearpay banner
Do the following:
1. Login to your **Shopify Admin** and navigate to your **Theme Settings** page: Go to **Online Store**> **Themes**.
2. Click **Customize** to change the theme with the Clearpay Banner.
3. Click **Clearpay Banner**.
4. Click the icon next to **Background color**.

* Use the controls to adjust the colour and fine tune brightness/saturation. To set the background colour to a known value, enter the hex value in the text box
* To automatically update the banner to the new colour you have selected, click outside the color controller window
5. When the banner colour is correct, click **Save** in the top-right corner of the window.